
Creation of online lectures and materials required for the teaching as well as on the other side as an educator is now innovating with the out-of-the-box ideas that bring creativity at its level best. The same is the case with remote learning. On one side, it inspires teachers to go creative beyond limits by using a screen recorder with facecam, and on the other hand, the students are also on their learning phase to do with level best.
This advanced-level creativity skillset gets more enhanced if you have a built-in moderator toolkit that can have creativity simplified. What’s more, that tool also needs to be a recording expert as it requires a recording screen with the perks of having a webcam and microphones at the same time. Follow this article to learn about a toolkit that can do it without any hassle.
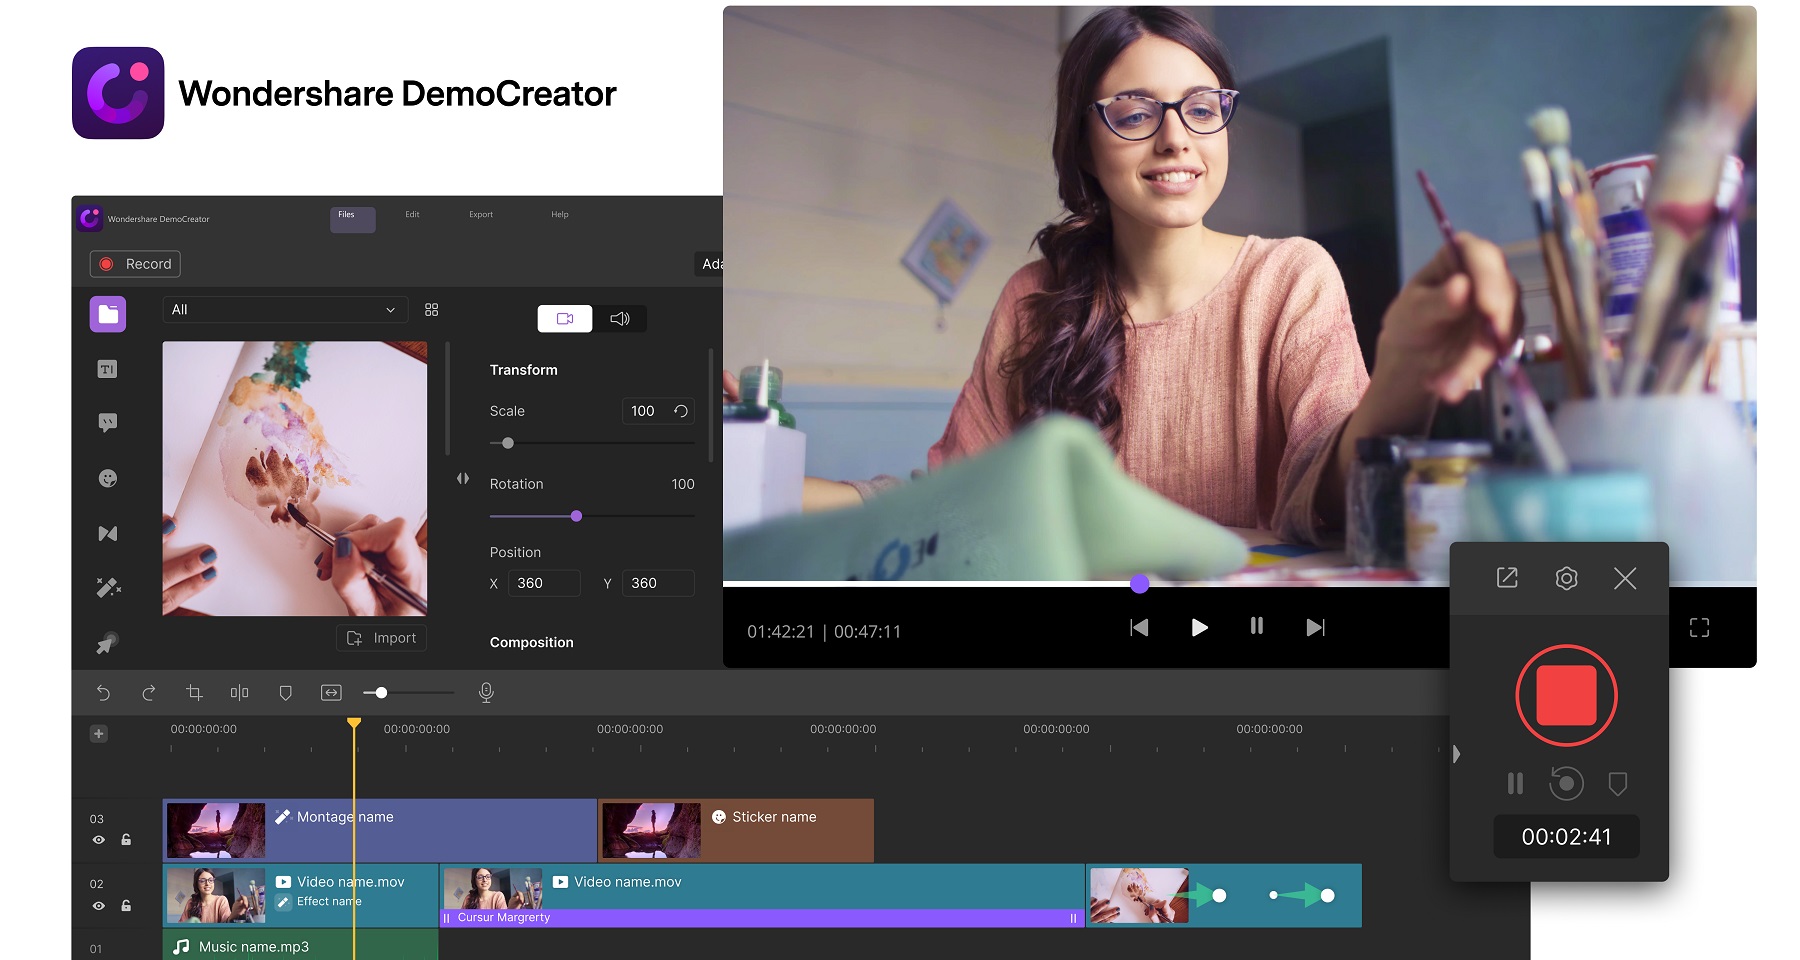
Wondershare DemoCreator Introduction
If you want to know that all-in-one screen recorder with webcam toolkit that can do both the tasks with creativity simplified, then Wondershare DemoCreator is here for you to provide you with the hassle-free solution. You can use this one-of-a-kind solution for all your creative ideas while recording your screen for tutorials, classes, lectures, sessions, and any kind of personal and public recordings with the perks of Webcam as well as the microphone recording facilities.
Now if you’re thinking of embarking on your first project with this intuitive platform, then here we’ve enlisted all the required steps to do so. Follow our lead to learn more.
- Download and open DemoCreator
The foremost step while embarking on your first screen drawing project with Wondershare DemoCreator is to download from the official website and install this software which has all the solutions for your screen recording with webcam requirements. After the download finishes, now you need to install it inside your system so you can start using it eventually.
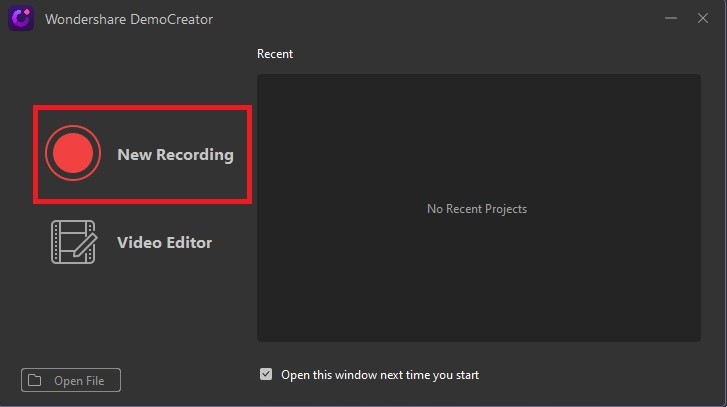
- Click New recording
Hit the New Recordings button which eventually takes you towards the recording interface of this software as follows:
- Set the recording area
You can also opt for screen resolution and record-specific windows of your screen so you can record precisely and easily.
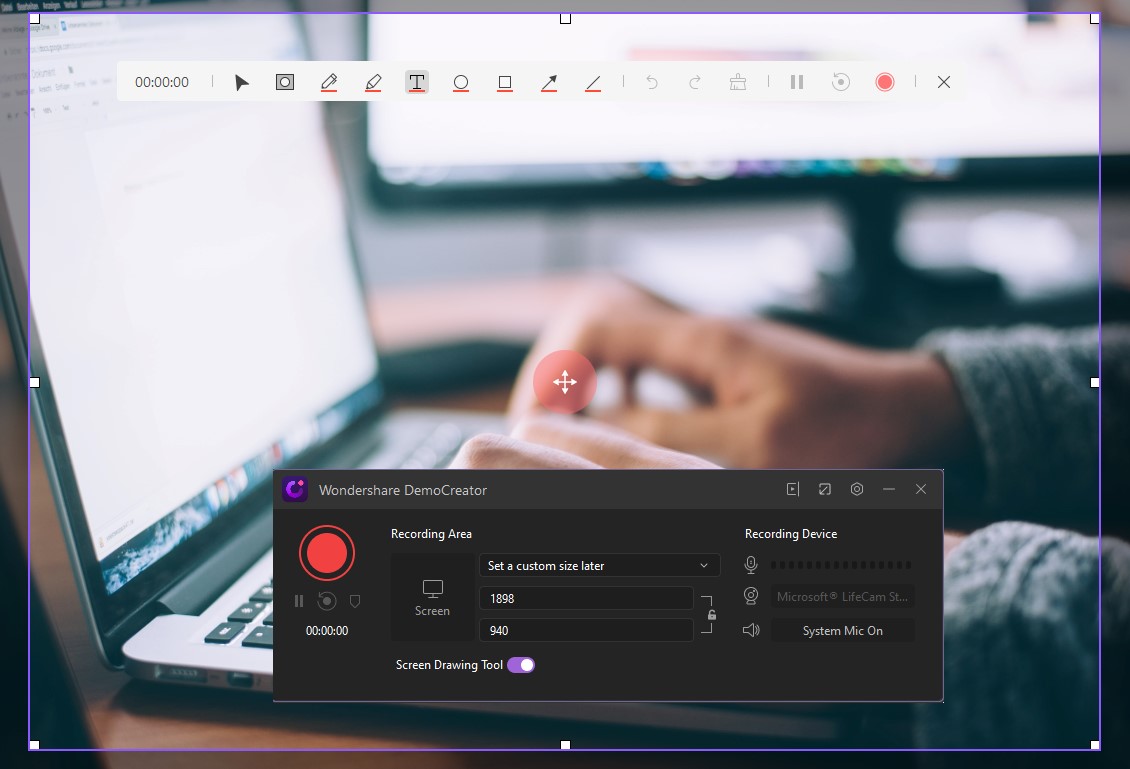
- Configure audio recording settings and webcam
With Wondershare DemoCreator, you can easily opt for Microphone, Webcam, and System Sound classifications with its powerful and handy recording interface.
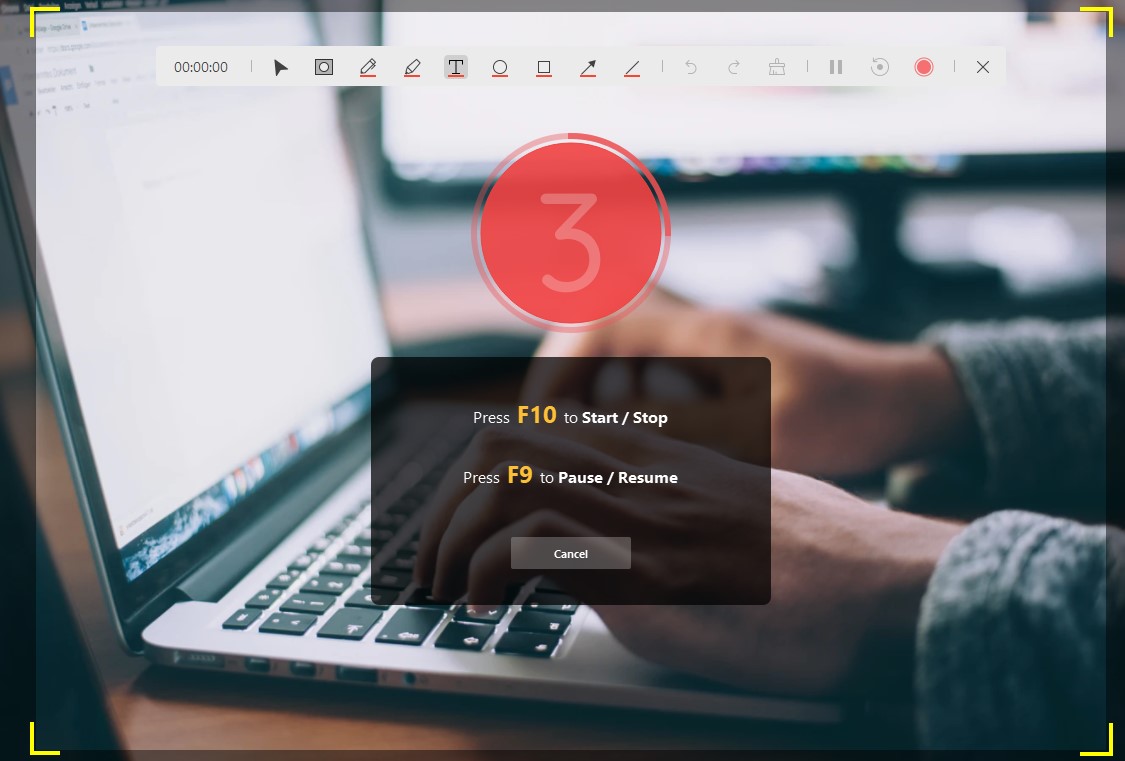
- Click to start recording.
After you’ve set up the screen drawing tool with the customizable menu bar of the DemoCreator, you can now start your recording and do your specific drawings on the screen in a lively manner.
Live Recording Creativity Features
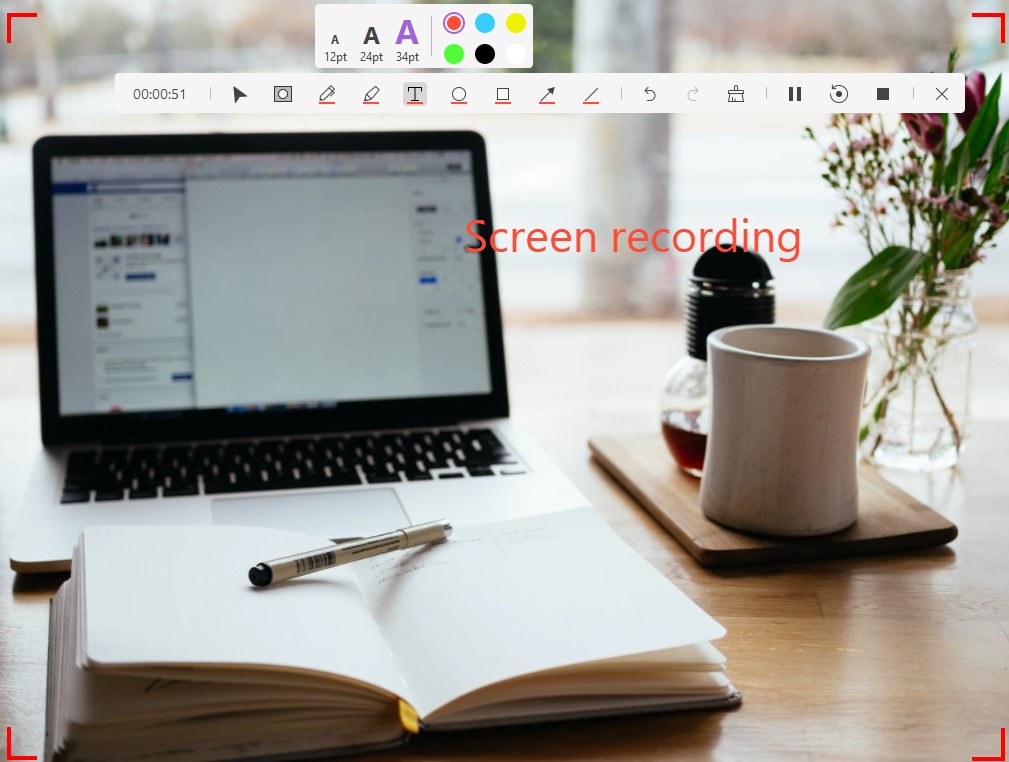
The best part with DemoCreator software is that it also allows you to draw on your screen while recording as well. To launch the screen drawing editor, simply enable the Screen Drawing Tool slider from the recording window as follows:
- Now within the screen drawing toolkit, you can perform various functions to your screen recording in parallel. In the first group from the left, you can perform Cursor and Spotlight features to your screen recordings from the menu bar as follows:
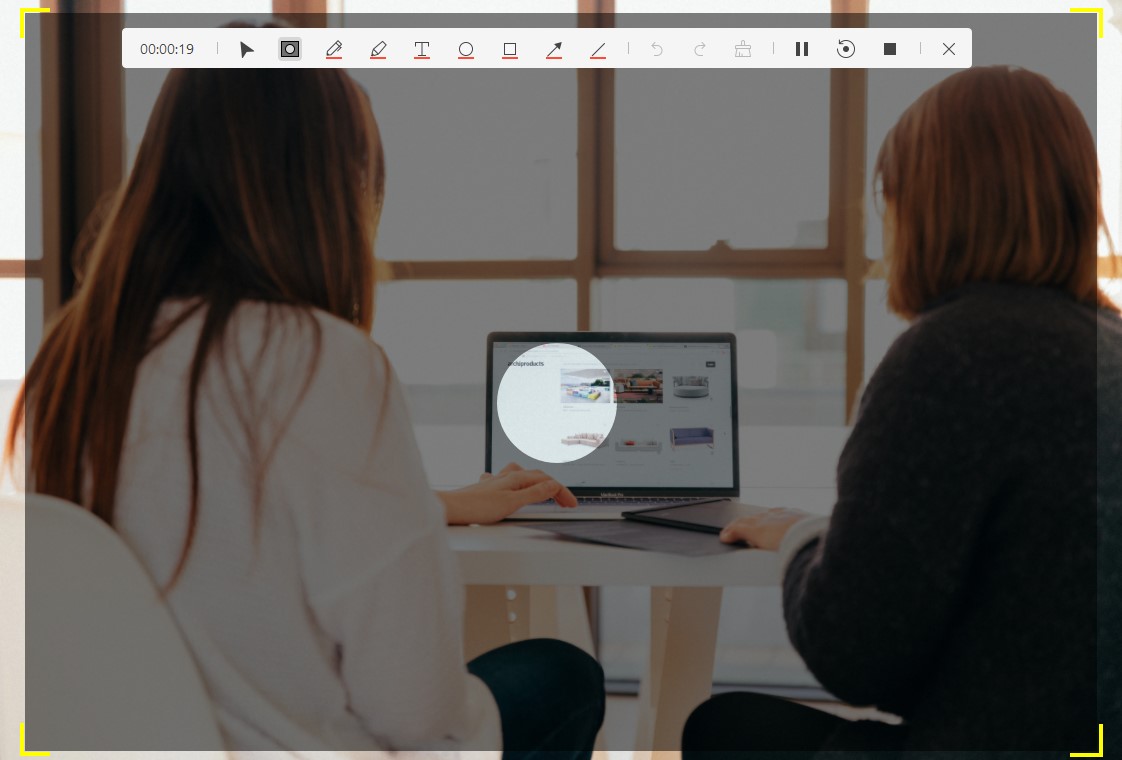
- DemoCreator will record the screen region you have set and you can capture your webcam at the same time.
- From that menu bar, you can draw Line, Arrows, Rectangle, Circles, Highlights, and much more with your customized Pen button as follows: You can set adding Pen, Highlight, Text, Circle, Rectangle, Arrow, Line when recording.
- You can also Pause, Restart, and Start your recording of the screen while drawing with that menu bar of Screen Drawing Tool.
Editing Features of DemoCreator
As soon as you’re finished with the recording, now is the time to bring creativity to your recorded clips. To do that, with ease, hit the Stop button and you’re right into the video editor of this software which is also easy to understand. Here’s the step-by-step guide of its features:
- Cut Clips
Inside the video editor, you can add your recorded clips to the timeline and perform the cutting of unwanted scenes from the recorded clips by simple dragging and clicking on the clips.
- Picture-in-picture effects.
The special effects also include Picture-in-Picture effect you can get right inside the Effects menu.
- Pan & Zoom
You can also use the Zoom-in and Zoom-out effect which will give your specific parts of the recordings a special highlight.
- Add cursor effect to your video.
Cursor effects are important for tutorial recordings and to add your desired effect, just go to the Cursor effects menu and select the one to use.
- Record Voiceover Separately
You can also add additional voiceover recordings to your videos inside the timeline. To do that, just record the voiceover from and add it to the timeline.
Export the video
In the final step, when you’re done with all the editing and the screen drawing on your screen recordings, here’s the final step that will take your video to your desired location. Hence, to do that, hit the Export button available at the top-right corner of the screen. This button will open the Export window which has several customizations for you to opt for meanwhile you can export it to your desired location:
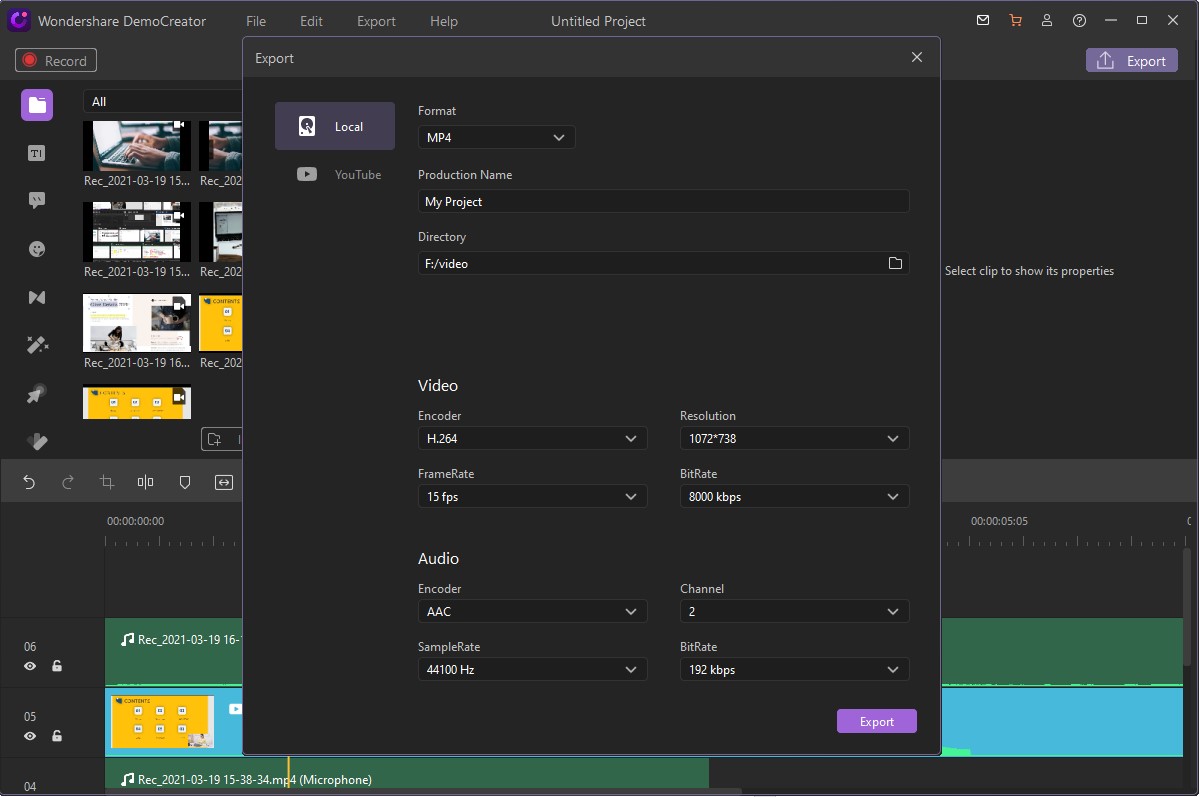
In addition to that, with Wondershare DemoCreator, you can also opt for direct sharing your masterpiece to YouTube just by going into the YouTube menu as well.
Summing Up
From the above guide, it’s well-explained that Wondershare DemoCreator has made it handy for newcomers to perform the screen recorder with facecam. This makes this toolkit very liable and effective for the teaching and learner community due to its advanced level HD recordings for video, so it will be a wise choice to opt for this software for your screen recording tasks with webcam.